FAQ
Customize your signup form
To access customize your signup form, follow these steps.
- Navigate to the Audience tab.
- If you have more than one audience, click the Current audience drop-down and choose the one you want to work with.
- Click the Manage Audience drop-down and choose Signup forms.
- Select Form builder.
- Click the Forms and response emails drop-down menu, and choose which form you want to edit.

- Click the Design it tab.

- Click through the Page, Body, Forms, or MonkeyRewards tabs to review the customization options. Use the fields and drop-down menus to make any changes you want to the styles, colors, and fields. We'll save your changes automatically.
- When you're done, click Save & Close.
For in-depth instructions, read the article How the Form Builder Works.
Create a campaign
Next, you'll craft your first campaign. A campaign is a message that you share through email, ads, or other channels. In Mailchimp, most users start with a regular email campaign.
To create a regular email campaign, follow these steps.
- Launch the Campaign Builder.
- Enter a campaign name and click Begin.

- On the Recipients step of the Campaign Builder, choose an audience from the drop-down menu and click Next.
- On the Setup step, input your Email subject, Preview Text, From name, and From email address. Select tracking tools, connect social media, and configure advanced settings from the available options.
- When you're finished, click Next.
- On the Template step, choose one of our template types.
- In the Design step, you'll input and customize your campaign content.
- When you're done designing your campaign, click Next to navigate to the Confirm page.
On the Confirm page, we'll make sure that all of the steps have been completed and alert you to anything that might need your attention before sending. Schedule your campaign to send at a later date or time, or send it right away.
SMS marketing will improve my business
SMS Marketing is one of the best channels for communicating urgent information to your customers
How to order
1. Log in to business Center
2. Click on Ad-On for business
3. Select SMS Subscription and click on order and make payment.
Downloading WhatsApp Business
WhatsApp Business is a free-to-download Android app for small businesses.
Before downloading the app, please be aware of the following:
- If you have an existing WhatsApp Messenger account, you'll have the option to migrate your chat history to your new WhatsApp Business account. We recommend that you make a manual backup before proceeding.
- Your chat history can't be migrated back to WhatsApp Messenger if you decide to stop using WhatsApp Business.
- You can use both apps, WhatsApp Business and WhatsApp Messenger. Each app, however, must be linked to its own unique phone number. It's not possible to have one phone number linked to both apps at the same time.
- The app is currently being rolled out to the world. If it's not available now, please check Google Play Store again later.
Then:
- Download WhatsApp Business from Google Play Store.
- Verify your business phone number, the one you wish to use to talk to customers.
- Restore your chat history, if you wish.
- Set your business name.
- Build your profile. Tap More options
> Settings > Business settings > Profile
How to use Facebook Messenger without a Facebook account
If you don’t have a Facebook account but still want to use Facebook Messenger, it’s very easy to do so. Here’s how.
- Download the Facebook Messenger app to your Android or iOS device.
- Open the app. You’ll be asked to Log in with Facebook. Instead, tap the Create new account button below it.
- Enter your phone number and name.
That’s all there is to it. You should now be able to use Facebook Messenger just as easily as someone else. Through Messenger, you can upload photos, videos, start group chats, and more — all without a Facebook account.
How to deactivate your Facebook account and keep Facebook Messenger

- On desktop, open the Settings menu and head to the Manage Account section.
- Tap the Deactivate your account link.
- Enter your password.
- Complete the survey and deactivate your Facebook account.
- Open up the Facebook Messenger app and continue using it as you normally would.
Sign In to Google or YouTube
Step 1
Go to YouTube.com and sign in with your personal YouTube account credentials. If you already have a Google account, you can use it because YouTube is owned by Google. If you don't have a Google or YouTube account, sign up for a new Google account.
- Go to the Google Account setup screen.
- Enter your name and email address in the fields provided.
- Create and confirm a password.
- Select your birthday and (optionally) your gender.
- Enter your mobile phone number and select your country.
- Click the Next Step button.
- Read and agree to the terms of service and enter the verification information.
- Click Next to create your personal account.
Google confirms your new personal account. You use the same account information to manage all of Google's products including Gmail, Google Drive, and YouTube.
Now that you have a personal account, you can create a Brand Account for your company or brand.
Step 2
Make a YouTube Brand Account
Now, you can create a Brand Account.
- Log in to YouTube using your new personal credentials.
- Click your image or avatar in the upper right corner of the YouTube screen.
- Select Creator Studio from the drop-down menu.
- Click your image or avatar in the upper right corner of the screen again and select the Settings gear next to Creator Studio in the screen that opens.
- Click Create a new channel in the settings screen that opens.
- Enter a name for your new YouTube business account and click Create to start using YouTube under the new company name immediately.
When selecting a brand name:
- This account is going to reflect your business. Use a name that does just that. Don't pick a random name or use your email account username.
- Make the name short and memorable, avoiding numbers or strange words that take away from the fact that this is a business account.
Step 3
Add Managers to the YouTube Brand Account
Brand Accounts are different from personal YouTube accounts in that you can add owners and managers to the account.
Owners can add and remove managers, remove listings, edit the business information, manage all the videos, and respond to reviews.
Managers can do all those things except add and remove managers and remove listings. Individuals classified as communication managers can only respond to reviews and do a few other lesser managerial duties.
To add managers and owners to your Brand Account:
- Sign in to YouTube with the personal account you used to create the Brand Account.
- Click your image or avatar at the top right of the YouTube screen and then choose the Brand Account or channel from the list.
- Click your image or avatar again and click the Settings gear icon to open the channel's account settings.
- Click Add or remove managers from the Managers area.
- Click the Manage Permissions button.
- Choose the Invite new users icon at the top right of the Manage permission page.
- Enter an email address that belongs to the user you want to add.
- Choose a role for that user from the drop-down below the email address. Your options are Owner, Manager, and Communications Manager.
- Click Invite.
Sign up for Google My Business
- On your computer, sign in to Google My Business.
- Sign in to your Google Account, or create one. Then, click Next.
- Sign up with your business email domain since this account will be for your chain. Enter the name of your business or chain. You can also select your chain from the suggestions that appear as you type (if applicable).
- Enter your business’ or chain’s address. You may also be asked to position a marker on the location of your chain’s branch on a map. If your business doesn’t have a physical location but works in a service area, you can list the area instead. Then, click Next.
- Choose if you want your business location to appear on Google Maps.
- If you serve customers at your business address:
- Enter your business address.
- Click Next.
Tip: If you also serve customers outside your business address, you'll have the option to list your service areas as well.
- If you don't serve customers at your business address:
- Enter your business address.
- At the bottom, click I deliver goods and services to my customers
Next.
- List your service areas, then click Next.
- If you serve customers at your business address:
- Search for and select a business category. You can also choose a more specific category as appropriate. Then, click Next.
- Enter a phone number or website URL for your chain, and click Finish.
Tip: You'll also have the option to create a free website based on your information. It’s recommended that you provide the individual phone number or store page for each location, rather than a single centralized call center. - Select a verification option.
- To verify later, click Verify later
Later. If you’re not authorized to manage the Business Profile for the chain, find the person in your organization who’s authorized and continue the process.
- To verify later, click Verify later
Review your business information
No matter what you see, confirm that your business information is correct. It’s important that when you verify your business information, everything is ready to appear to customers across Google.
To edit incorrect information, follow these steps:
- Click Later.
- If you manage more than one location, open the Menu
and click Manage locations. Then, select the location you want to edit.
- Click Info from the menu on the left side of the screen.
- Click Edit
next to each section you’d like to change and enter your business information.
Now that you’ve either claimed or created your listing, it’s time to verify your business. After you verify, your business information will be eligible to appear across Google.
Establish your Twitter presence
Your profile shows the world who you are, and first impressions count. Each element should showcase your best content and accurately reflect your message.
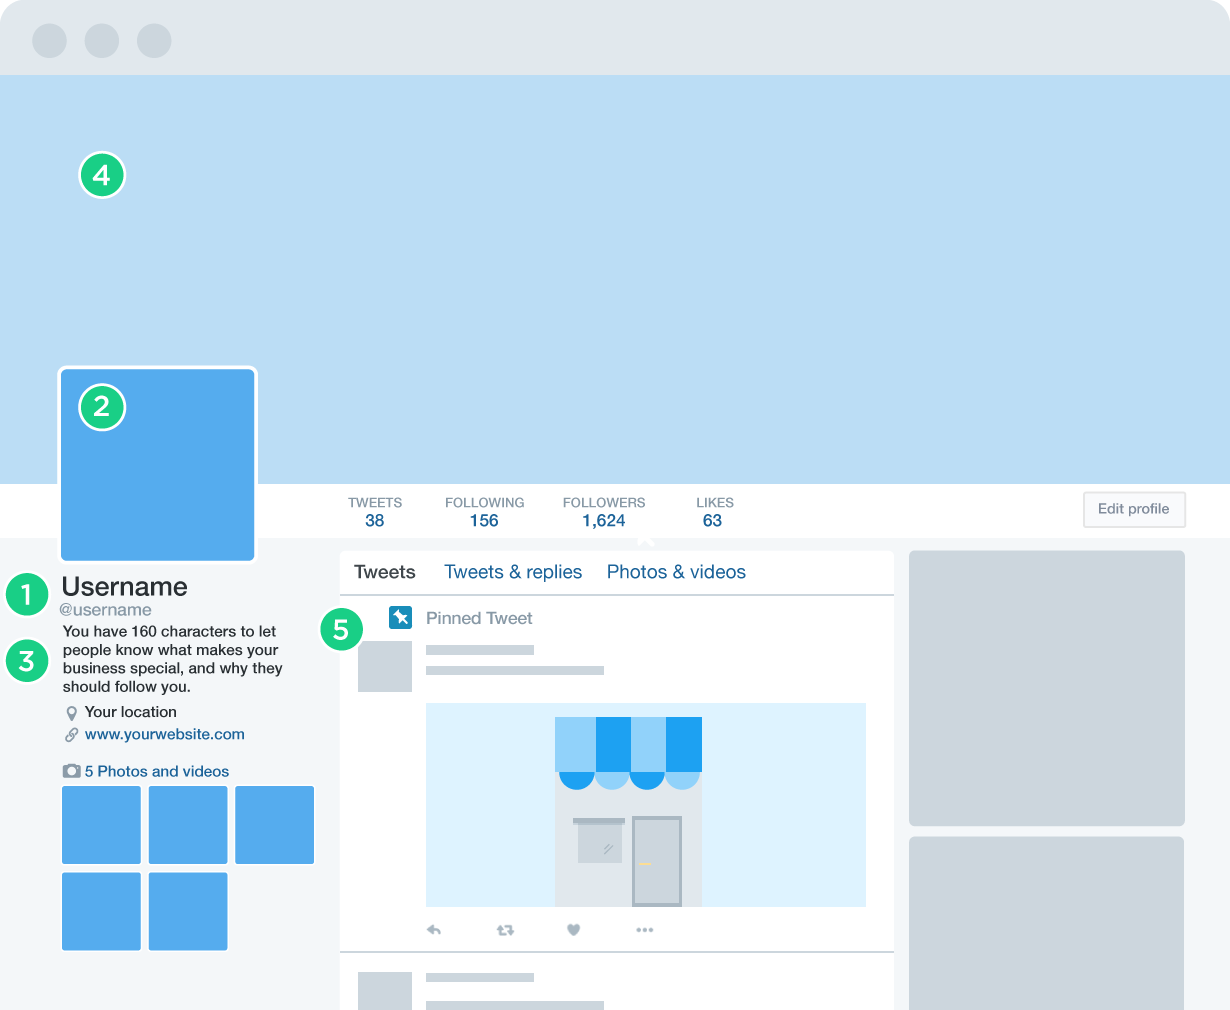
Here’s an overview of the five different parts of a Twitter profile and some best practices to keep in mind if you plan to advertise on Twitter.
-
Your Twitter @name
Your @name is your unique identifier on Twitter. It can contain up to 15 characters and should help people easily find your business. Your name (which you can change as you please) appears above your @name (which is permanent).
-
Your profile photo
Choose a profile photo that visually represents your business or brand and fits well in a small space. This image isn’t just on your profile page; it is the icon in every Tweet you post.
-
Your bio
You have 160 characters to let people know what makes your account special, and why they should follow you. Include useful information, such as what you tend to Tweet about, your location or business hours, and a link to your website. Use a unique link, so you can track visitors to your site from Twitter.
-
Your header image
Consider this your billboard. You can use event photos, feature products, use a graphic with text, or highlight your work and team. Swap out this image periodically to spotlight promotions, events, product news, or just keep things fresh.
-
Your pinned Tweet
Keep an important Tweet at the top of your timeline by pinning it there. Click on the “more” option on the Tweet you want to pin and select “Pin to your profile page.” Use this feature to make sure visitors to your profile can’t miss your biggest, latest news.
Twitter profile specifications
- The recommended image size for your profile pic is 400x400 pixels; the image will be resized to fit.
- The recommended size for a Twitter header image is 1500x500 pixels. On mobile, it’ll be cropped to a 2:1 aspect ratio.
- Use a GIF or PNG file for vector-based and line art images.
- For photos, upload a JPG or PNG file.
How to set up a Facebook Page for your business
Step 1: Sign up
Go to facebook.com/business and click Create a Page in the top right-hand corner.
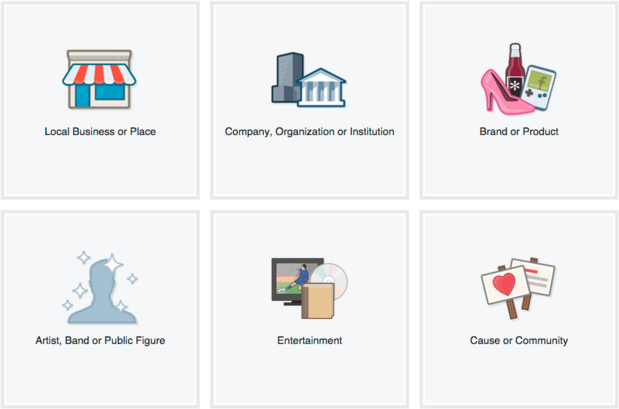
When you click on a business type, a box will open asking for a few further details, like the name of your business, your address, and your Page category. Categories are basically sub-types within the larger business category you’ve already chosen. When you start typing in the category field, you’ll see a list of potential category options to choose from.
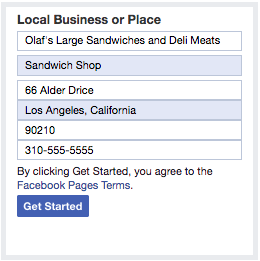
When you’re ready, click Get Started.
Step 2. Add Pictures
Once you’ve chosen a great one, click Upload Profile Picture. Once you’ve selected an appropriate image, click Upload a Cover Photo.
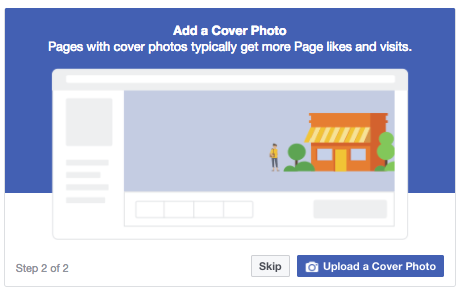
Step 3: Explore your new Page
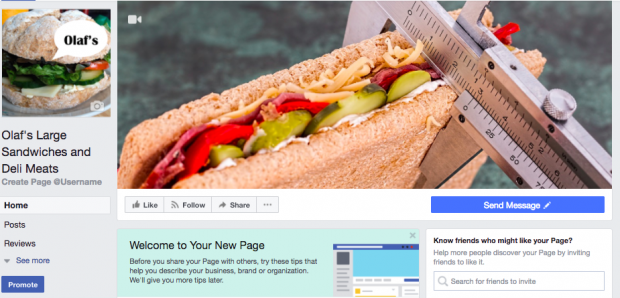
Step 4: Add a short description
Click Add a Short Description,
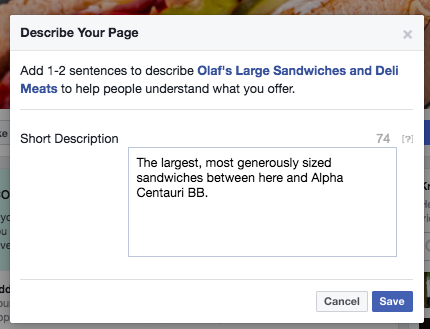
Click Save when you’re done.
Step 5: Create your username
Click Create a Username for Your Page to set up your vanity URL.
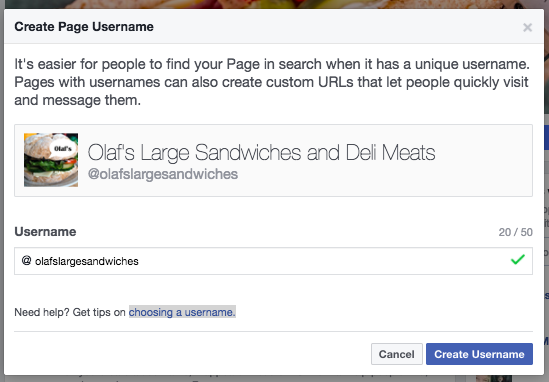
Click Create Username
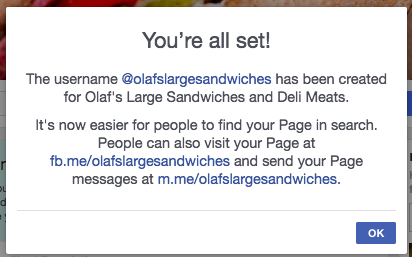
Click OK to continue filling in your Facebook for business Page details.
Step 6: Complete your about section
This is also the screen where you can add a longer description of your business. Click Edit Story on the right side of the page to provide a detailed description of what your business offers customers and why they should Like or Follow your Page.
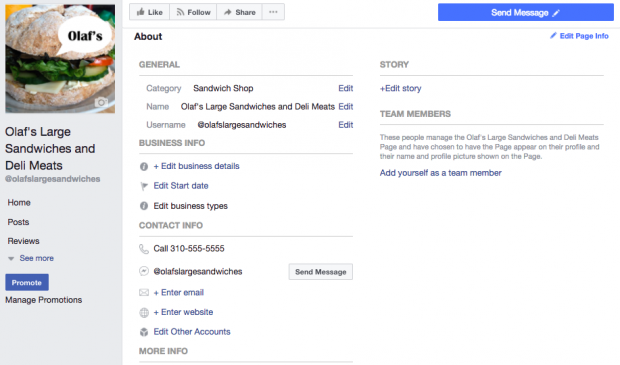
To specify your business location and hours, click Edit Page Info on the top right of the screen.
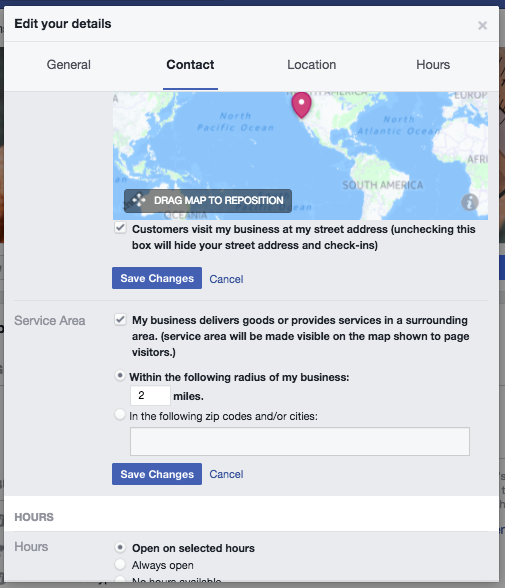
When you’re finished, click Save Changes.
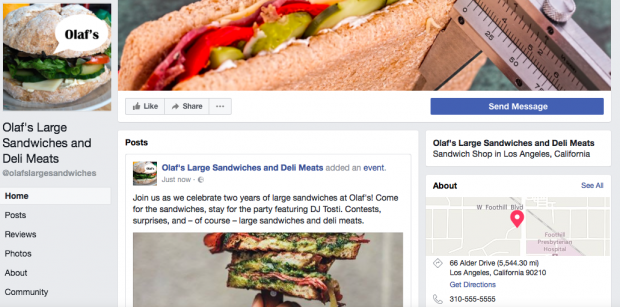
Step 7. Create your first post
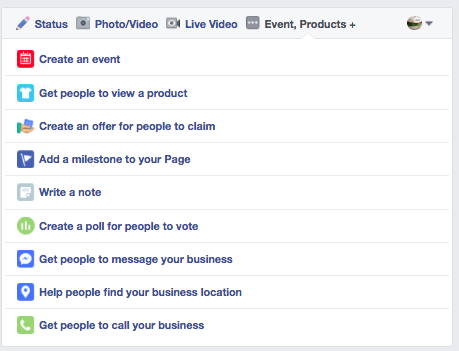
Your Facebook Business Page now represents a robust online presence that will make potential customers and fans feel comfortable interacting with you.
Step 8: Start engaging
Now you’re ready to give your Facebook Business Page.

 Next
Next 


 LOCATION
 LOG IN